Garbage Disposal Not Working? Call Plumber Near You
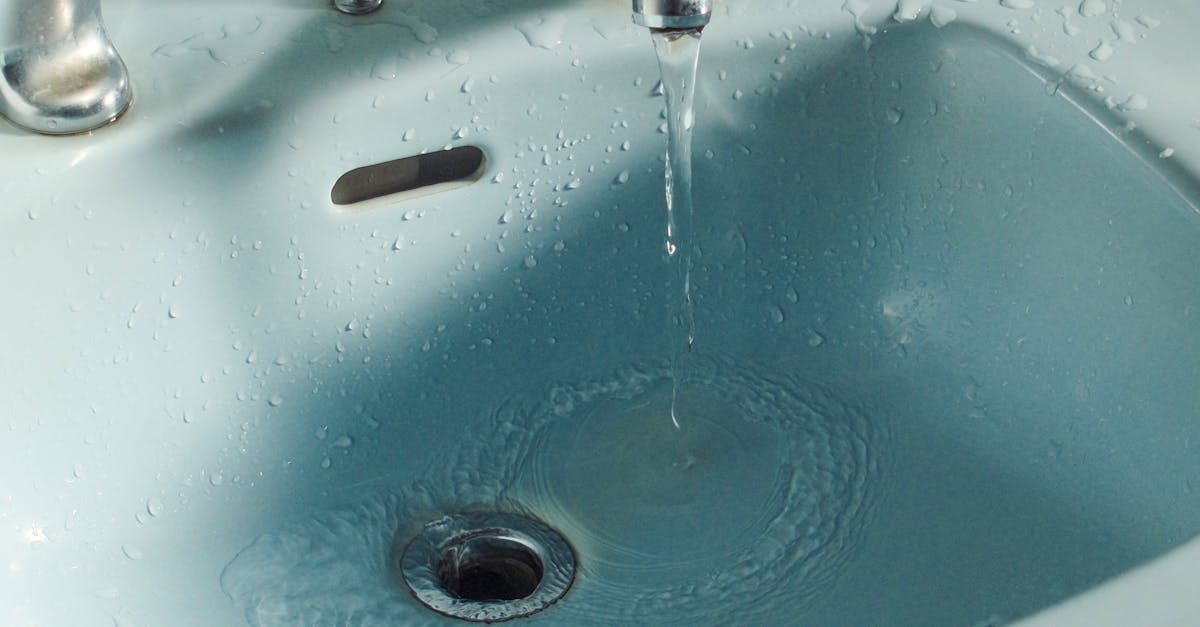
You flip the switch and nothing happens. Or worse — you hear that low, angry hum of a motor straining against something it can't move. Your garbage disposal has officially stopped cooperating, and now you're staring at a sink full of last night's dinner scraps with nowhere for them to go.
Here's the good news: the majority of garbage disposal failures are completely fixable without calling anyone. A jammed plate, a tripped reset button, a blown circuit — these are all problems you can solve in minutes with the right knowledge. This guide walks you through every scenario, from the totally dead disposal to the one that leaks, smells, or sounds like a rock tumbler.
Understanding What Your Disposal Is Actually Telling You
Before you grab a wrench or start Googling replacement units, listen carefully to what your disposal is doing — or not doing. The behavior gives you almost everything you need to diagnose the problem.
Facing a plumbing emergency? Our emergency plumber chicago team responds within minutes.
A garbage disposal that won't start at all, produces zero sound, and doesn't respond to the switch has a power issue. A disposal that hums loudly but doesn't spin has a jam. One that starts, grinds for a few seconds, then shuts off is overheating. And a unit that works perfectly well mechanically but leaks underneath points to a seal or mounting problem.
Each of these requires a different approach, and jumping to the wrong fix wastes time and sometimes makes things worse.
The Most Common Reasons a Garbage Disposal Stops Working
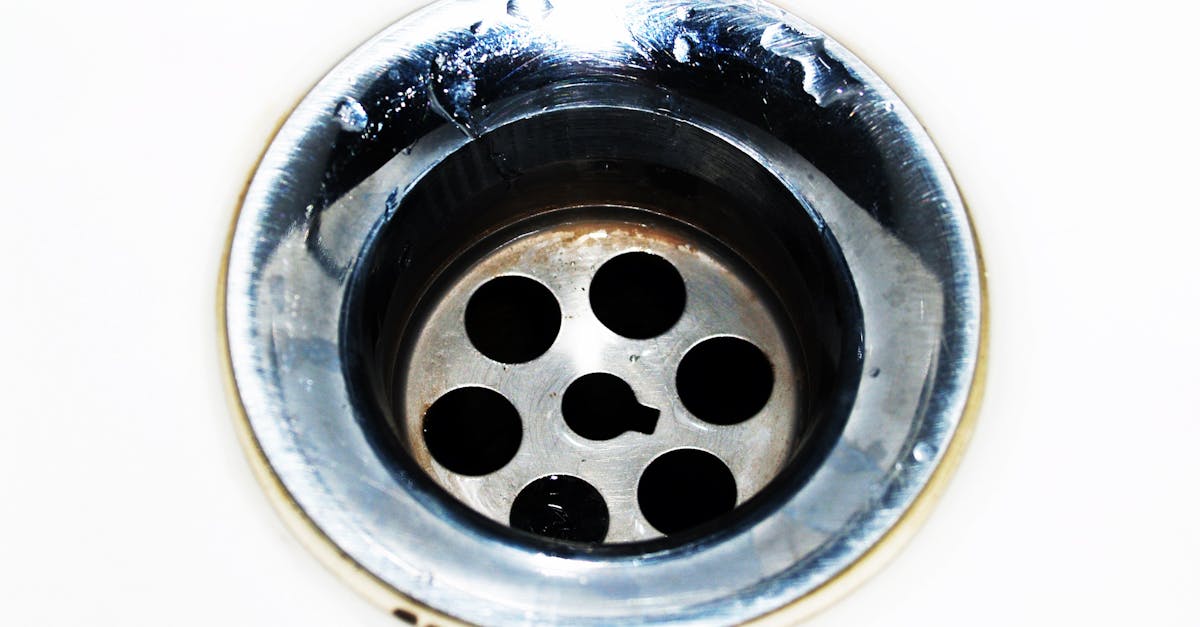
1. The Grinding Plate Is Jammed
This is the number one cause of disposal failure. Garbage disposals don't have spinning blades — they use a rotating grinding plate with impellers that push food waste against a stationary grinding ring. When something hard, fibrous, or irregular gets lodged between the plate and the ring, the motor bogs down and triggers the thermal overload protector to cut power to the motor.
Common culprits include fruit pits (peach, avocado), small bones, bottle caps, utensils that slipped in, twist-off metal caps, and dense fibrous materials like celery strings or artichoke leaves that wrap around the impellers.
2. The Reset Button Has Tripped
Every garbage disposal has a built-in thermal overload protector — a small button on the bottom of the unit. When the motor overheats (usually from a jam or extended use), this button trips and cuts power to the motor as a safety measure. The disposal appears completely dead, but all it needs is a cool-down period and a reset.
3. Tripped Circuit Breaker or GFCI Outlet
Many disposals are wired to a dedicated circuit, and some are plugged into a GFCI outlet under the sink. If the GFCI has tripped (usually due to a water splash near the outlet), the disposal gets no power. Similarly, a tripped breaker in your panel will kill the unit entirely. This gets mistaken for a dead motor more often than you'd think.
4. Worn-Out Motor
After 10+ years of use, the motor brushes wear down, windings degrade, and the unit simply can't generate enough torque to function reliably. If your disposal is old and has been repaired multiple times, this is the likely culprit.
5. Leaking Seals or Loose Mounting
Water pooling under the sink near the disposal isn't always a drain problem. The disposal itself has several potential leak points: the sink flange at the top, the side discharge where waste goes into the drain line, and the bottom of the unit if the internal seals have failed. Each requires a different repair.
6. Clog in the Drain Line
The disposal can run perfectly while a blockage in the drain pipe past the disposal prevents water from leaving. This shows up as water backing up into the sink even though the disposal sounds normal. The problem isn't the disposal — it's downstream.
Step-by-Step: How to Fix a Garbage Disposal That Won't Work
Step 1 — Kill the Power First
Before anything else, turn off the disposal switch and unplug the unit or flip the breaker. Never put your hand inside a disposal — even a "dead" one can activate unexpectedly. Use a flashlight to look inside, never your fingers.
Step 2 — Check the GFCI and Circuit Breaker
Go under the sink and look for a GFCI outlet (it'll have "Test" and "Reset" buttons). Press Reset. If you don't have a visible GFCI under the sink, check your electrical panel for a tripped breaker labeled "disposal" or "kitchen." Reset it and try the disposal again before doing anything else.
Step 3 — Press the Reset Button on the Disposal
Look at the bottom of the disposal unit hanging under the sink. You'll see a small red or black button slightly protruding. Press it firmly until you feel it click into place. If it springs right back out, the motor is still too hot. Wait 10–15 minutes and try again. Once it clicks and stays, restore power and test the disposal.
Step 4 — Free the Jam with a Hex Wrench
If you hear humming but no spinning, or if the reset button keeps tripping, the plate is jammed. Locate the hex socket in the center of the bottom of the disposal — it's typically a 1/4" or 5/16" fitting. Insert an Allen wrench (hex key) and work it back and forth manually to free the grinding plate. You'll feel resistance, then the plate will start to move more freely as you dislodge whatever is stuck.
Once you can rotate the hex wrench through a full revolution in each direction, the jam is cleared. Press reset, restore power, and run cold water before testing.
Step 5 — Use the Jam Buster (If Included)
Many disposals come with a small offset wrench called a "jam buster" specifically for this purpose. It fits the same hex socket. If you've lost yours, a standard Allen wrench from any hardware store works fine. InSinkErator disposals typically take a 1/4", while Waste King uses 3/16".
Step 6 — Remove the Obstruction
After freeing the jam, use tongs or needle-nose pliers to reach in and remove whatever caused it. Never use your bare hand. Run cold water for 30 seconds before testing.
Step 7 — Address Leaks by Location
Leaking from the top (sink flange): The mounting flange has come loose or the plumber's putty has dried out. This requires removing the disposal, reseating the flange with fresh putty, and remounting. This is doable as a DIY project but takes about an hour.
Leaking from the side: The gasket at the discharge outlet has worn out. Replace the gasket — they cost under $10 and are available at any hardware store.
Leaking from the bottom: The internal seals have failed. At this point, replacement is almost always more economical than repair, especially on older units.
Expert Plumber Tips You Won't Find in the Manual
- Always run cold water, not hot. Cold water keeps grease solid so it grinds out as particles. Hot water melts grease, which then re-solidifies further down the drain and causes clogs.
- Run water before and after grinding. Start the water, then turn on the disposal, feed in waste, and keep the water running for 15–20 seconds after turning the disposal off. This flushes the drain line.
- Ice cubes sharpen the impellers. Grinding a full tray of ice cubes monthly cleans buildup off the grinding ring and keeps the impellers from getting sluggish.
- Don't overfeed it. Feed waste in gradually rather than dumping everything in at once. The disposal's motor has limits — overloading it is the fastest path to jams and overheating.
- Citrus peels in small amounts are fine — and smell great. The "citrus is bad for disposals" myth is largely untrue. Small pieces of lemon or orange peel actually help clean and deodorize.
What Absolutely Should Not Go in a Garbage Disposal
Even a brand-new, top-of-the-line disposal will fail prematurely if you put the wrong things through it. This list isn't guesswork — it's the consistent source of the jams and drain clogs plumbers deal with every day:
- Grease, oil, or fat — coats the drain line and causes blockages far past the disposal
- Fibrous vegetables — celery, artichokes, asparagus, and onion skins wrap around impellers
- Starchy foods in bulk — pasta, rice, and potato peels expand with water and create thick paste-like clogs
- Hard bones — small soft bones like fish are fine, but poultry and beef bones will jam or damage the grinding plate
- Coffee grounds — they seem fine going in but accumulate in the drain trap and eventually cause a blockage
- Pits and seeds — avocado pits, peach pits, cherry pits, and similar hard materials are a certain jam
When to Stop DIY-ing and Call a Plumber
Most garbage disposal problems are accessible to any homeowner willing to spend 15 minutes. But there are clear lines where DIY stops making sense:
- The motor hums continuously despite clearing the jam and pressing reset — the motor likely needs replacement
- The unit leaks from the bottom (internal seals have failed — replacement is cheaper than repair)
- You've reset the breaker and GFCI and the unit still has zero power — there may be a wiring fault
- The disposal is over 12 years old and has failed multiple times — replacement is the better investment
- You notice a burning smell from the motor — this indicates motor damage, not a jam
A plumber can replace a garbage disposal in 1–2 hours. For drain clogs downstream of the disposal, see our guide on kitchen sink clog repair or our professional drain cleaning service page.
Is It Safer to Replace Than Repair?
This is a question worth answering honestly. New garbage disposals range from $80 for a basic 1/3 HP model to $350+ for a premium 1 HP unit with multi-stage grinding and sound insulation. If your current unit is over a decade old and is experiencing motor issues, you're better off replacing it. The repair cost alone — parts, labor — can approach the cost of a new mid-range unit.
If your disposal is relatively new (under 5 years) and the issue is a jam, a leak at a gasket, or a tripped reset, absolutely repair it. These fixes cost almost nothing.
Safety First: Rules for Working on Your Disposal
Critical Safety Guidelines
- Disconnect power completely — unplug the unit or flip the breaker before any work
- Never use your hand to feel inside — use tongs, needle-nose pliers, or a flashlight
- Don't pour chemicals into a disposal — drain cleaners corrode internal components
- Test with the switch, not your hand — after any repair, step back and use the wall switch to test
- Keep kids away — educate children that the disposal switch is not a toy
What It Costs to Fix or Replace a Garbage Disposal
| Issue | DIY Cost | Professional Cost |
|---|---|---|
| Jam clearing (hex wrench fix) | $0 — $5 (hex key) | $75 – $125 (service call) |
| Reset button trip | $0 | $75 – $100 |
| Discharge gasket replacement | $5 – $15 (part) | $100 – $150 |
| Sink flange / putty reseal | $10 – $20 (putty + gasket) | $100 – $175 |
| Full unit replacement (mid-range) | $120 – $200 (parts) | $200 – $450 (parts + labor) |
| Drain line clog past disposal | $10 – $30 (drain snake) | $100 – $200 |
Frequently Asked Questions
Why is my garbage disposal humming but not spinning?
Humming without spinning almost always means the grinding plate is jammed. Something hard — a bone fragment, utensil, or fruit pit — is lodged between the plate and the grinding ring. Use a hex wrench to manually rotate the plate from the bottom before pressing the reset button.
How do I reset my garbage disposal?
Look for the small red or black button on the bottom of the disposal unit under the sink. Press it firmly until you feel it click. If it immediately pops back out, wait 10 minutes and try again — the motor may still be overheated.
Why does my garbage disposal smell bad?
Food buildup on the grinding plate and inner walls causes odors. Run cold water, drop in a few ice cubes with coarse salt, and grind. Follow with half a lemon or a tablespoon of baking soda and white vinegar.
Can I fix a garbage disposal myself?
Yes — jams and reset issues are excellent DIY repairs. Electrical problems, persistent leaks at the mounting assembly, or a motor that won't start at all after troubleshooting typically require a licensed plumber or electrician.
How long should a garbage disposal last?
A quality garbage disposal lasts 10–15 years with proper use. If yours is older than 12 years and failing frequently, replacement is usually more cost-effective than continued repair.
What should never go in a garbage disposal?
Avoid fibrous vegetables (celery, artichoke), grease or oil, coffee grounds in large amounts, egg shells in bulk, and hard bones. These either jam the grinding plate, coat the drain line, or slowly damage the motor.
Disposal Won't Budge? We'll Fix It Today.
If you've worked through every step and your garbage disposal still isn't cooperating, it's time to call in a pro. Our licensed plumbers diagnose disposal problems fast — same-day service available in most areas.
Don't let a broken disposal turn into a bigger kitchen plumbing problem.
Available 24/7 • Upfront Pricing • No Surprise Fees